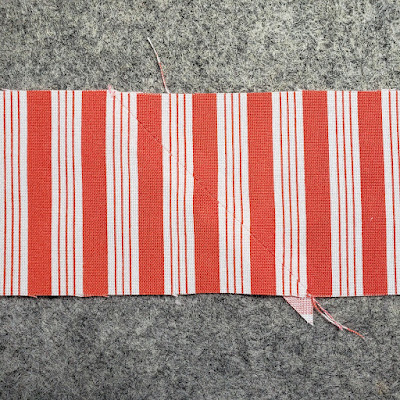
How do you feel about striped binding? I think it adds a fun touch to some quilts, providing I can find just the right stripe. It takes only a little more work to match the stripes at the seams if that's something that concerns you. Here's how I matched the stripes on the binding for the Chef's Kiss placemats and runner I shared last weekend.
 |
| Matched stripes on diagonal seams. |
I usually join binding strips with a diagonal seam to distribute the bulk of the seam. When the strips are folded in half, then sewn onto and folded over the edge of the quilt, a straight seam would result in 12 layers of fabric stacked together at the seam. That's not ideal!
Here's how I matched the stripes on a diagonal seam.
1. I made sure the ends of the strips were straight and square.
2. With the strip wrong side up I folded the end of one strips at a 45 degree angle as shown below, bringing the end down to match the lower edge of the strip, and pressed the fold flat.
4. With both strips right side up, I slid the folded end of the folded strip over the other strip until the stripes were aligned. I carefully finger pressed the fold to the bottom strip, checking that the stripes stayed aligned before pressing with a hot iron. The strips were now glued together along the fold.
4. Moving to the sewing machine, I unfolded the top strip and sewed in the crease from the fold.
5. I trimmed away excess fabric1/4" beyond the seam. I suggest folding the strip back to check the seam from the right side of the fabric, making sure the stripes are matched as expected before trimming.


Wow, that's impressive how sharp that join is! I may have to try that.
ReplyDeleteThis is a great visual tutorial. I have never used the glue but will try it next time. Thank you. Ps….Our group are still making your scrappy butterflies in charity quilts.
ReplyDeleteI love a strip binding. Thanks so much for your tip on matching. I always have a difficult time. I will try this on my next stripe binding!
ReplyDeleteNeat! Thanks!
ReplyDeleteKathleen - kakingsbury at verizon dot net
Genius!
ReplyDelete❤️,Kaholly