Thursday, March 14, 2024

Two-Colour Mystery Week 3 - template paper HST

If you're sewing along with me in the Two-Colour Mystery quilt-along, you should find the next clue in your email inbox around 9 am CDT today.  This week's task is to make half-square triangle squares (HST) in two different sizes.

The pattern offers two methods to choose from.  If you have access to a printer or copier, I strongly recommend the method that uses the templates I included.  This method makes many perfectly sized and perfectly square HST at a time.

If you've used Thangles or any sort of triangle papers, you know what to do.  For those of you who have not, here's a quick look at the process.  It's all described in the pattern, but photos can illustrate this in more detail.

*******************

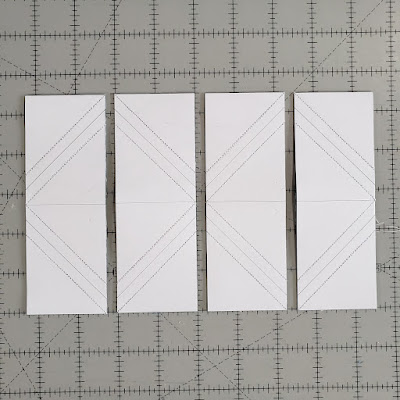
I'm demonstrating with the template for HST1 in the pattern, which makes 16 HST at a time.

1. Print out the template as many times as needed to make the number of units you need.   Be sure to choose "no scaling" or "actual size" or "100%" in your printer settings. 

Paper template for HST, with rotary cutter ruler

2.  Measure the 1" box to make sure the template printed out the correct size.  The box should measure 1" on every side.

A rotary cutting ruler beside a printed 1" square to measure accuracy of scale of printed template

2. Trim the excess paper outside the grey area.  This can be a rough cut.  It doesn't need to be precise.

Rotary cutter and ruler and HST template paper showing cut away grey margins

3.  Layer your fabrics, right sides together, followed by the paper template, right side up.  To plan ahead for pressing to the dark side later, layer fabrics as shown, dark on the bottom, followed by the light, then the paper.  You can pin the layers in place if you wish.

dark fabric, light fabric and HST template paper layered together.
hand separating layers of fabric and paper to show proper orientation (bottom fabric face up, top fabric face down)

5.   Decrease your sewing machine's stitch length to make it easier to remove the paper later.  I set mine to 1.5 on my machine.  Sew through the three layers, sewing on every dashed line on the template.  It's OK to stitch in the grey margins to travel to the next dashed line.

HST paper template after stitching on dashed lines
Stiches over the dashed lines and in the grey margin of HST template papers


6.  Carefully trim away the grey margins, keeping the cuts on the solid lines.

Rotary cutting ruler and cutter beside stitched layers of fabric and paper template, showing grey margins trimmed off.


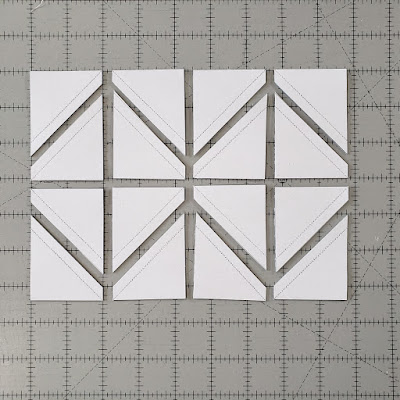
7.  Cut on all the solid lines.  Start with the vertical and horizontal lines, cutting precisely on the lines.  Cut on the diagonal lines last.  These cuts don't need to be as precise, as they're in the seam allowance.

HST template cut apart on vertical lines
HST template papers sandwich cut along horizontal lines
HST template sandwich cut along all solid lines

10.  Leaving the papers on to stabilize the fabric, press the seam to one side,  Once the unit is pressed,  tear away the paper.  Folding and creasing the paper along the seam makes it easier to tear away the paper.

3 HST fabric side up and  1 HST paper side up, before pressing.  2 HST pressed open.  Torn off papers from two HST.

11.  Trim away any dog ears.  You can use a rotary cutter or scissors.  I find scissors to be faster for this, but do what's easiest for you.
.
1 HST with dog ear, 2 HST with dog ears trimmed off,  small triangle dog ear trimmings and a pair of scissors to the right.

That's it.  I love that this makes many accurate units at once without having to trim down each unit individually.

*****************

If you prefer to make your HST without papers, you can find a quick tutorial on the two-at-a-time method here.

If you're sewing along, let me know how things are going with your mystery quilt.  I've been seeing  many wonderful and varied fabric combination.  It's going to be so much fun to see how different the finished quilts look, based solely on fabric choice.

If you haven't signed up for the free quilt-along, there's still time to register and catch up.  Weekly instructions are sent by email, so you need to register to get your email address on the mailing list.

Happy quilting,
Joanne

NOTE: The templates I used are only available as part of the instructions in the mystery QAL third clue, which are available to those who have registered for the quilt-along.  If you registered but did not receive the clue, please email me (joanne@canuckquilter.com).  Otherwise, you can google "triangle papers" to find similar products to purchase.

PS  You are welcome to join my Quilting with Canuck Quilter Facebook group to share your progress.  Please note that to be admitted you must answer the questions you will be asked when you ask to join. This helps me keep the bots and fake accounts out of the group.  Thanks for understanding.

My thanks to Northcott Fabrics for the fabrics I used in this tutorial.


10 comments:

  1. Where is the template for many at a time?

    ReplyDelete
    Replies
    1. The templates are included in the Two-Colour Mystery pattern. If you're registered for the sew along, that part of the pattern should have shown up in your inbox this morning. Otherwise, the entire pattern will be available to buy on April 11.

      Delete
  2. I couldn’t find it either.

    ReplyDelete
    Replies
    1. Did you check your email this morning? The templates are on pages 3 and 4 of the Week 3 instructions.

      Delete
  3. I cannot find the 1/2 square template to use today

    ReplyDelete
    Replies
    1. Did you check your email this morning? The templates are on pages 3 and 4 of the Week 3 instructions.

      Delete
  4. Oh my goodness that WAS a cool way to make a lot of HST all at once!

    ReplyDelete
  5. I’ve never tried making HSTs using paper like that. Looks like a good way to make lots of HSTs.

    ReplyDelete
  6. Hi Joanne, I'm intrigued by your method to make so many HSTs at a time but since I'm actually confidant in making 2 at a time (and I thought that was radical :-)), that's what I did and it worked out great. My new post is at https://quiltinglearningcombo.blogspot.com/2024/03/2-colour-mystery-quilt-and-updates.html

    ReplyDelete

Thank you for visiting. I truly appreciate your comments and will try to reply to comments by email if your commenting staus is not set to "no-reply".

If you have a question, emailing me directly at joanne@canuckquilter.com will ensure I have your address to respond. I promise I will not share your email address and I will not use it for any purpose other than replying to your message.